











We also considered 10 others:


Our Top Choice
Compare Features


The order above is not editorial opinion, and it is not paid placement. It comes from what shoppers across our network actually do - which budget thermal cameras they compare, and which they ultimately buy. We re-rank as new data comes in, so the long-term favorites have to keep earning their spot against new entrants. The full method, including how we make money.
Budget Thermal Cameras Buyer's Guide
Budget thermal cameras live on a sharp tradeoff: they can reveal hidden heat patterns that a normal inspection misses, but only if the sensor detail, measurement controls, and app or body design fit the job. The biggest risks are mistaking a pretty color image for real diagnostic resolution and trusting exact temperature numbers without checking emissivity, focus, range, and surface conditions.
Image
Clear thermal imagery helps you spot temperature differences accurately, especially when you’re inspecting small components, hidden leaks, electrical hot spots, or insulation gaps. Look for enough thermal resolution and image detail to make targets easy to distinguish, plus a display that stays readable in the lighting conditions where you’ll use it. Be cautious of cameras that produce blurry, overly blocky, or hard-to-interpret images, because they can make diagnosis slower and less reliable.
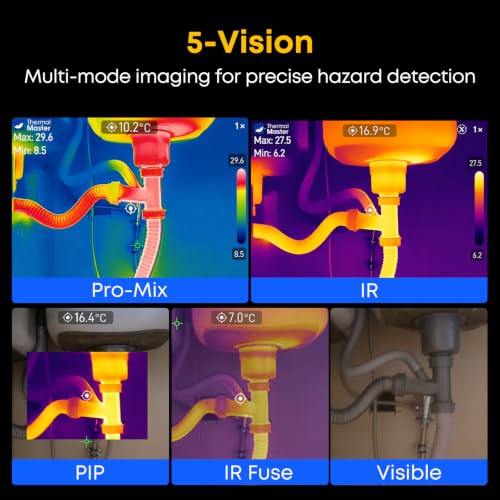
Prioritize real usable thermal detail over marketing claims: check the native thermal resolution, thermal sensitivity/NETD, focus method, field of view, and whether any “enhanced” image is interpolation rather than true sensor detail. For building leaks, radiant-floor lines, electronics, and HVAC patterns, a budget unit should show small temperature gradients cleanly and should offer useful palettes or visible-light/thermal fusion so you can identify what you are seeing, not just that something is hot. Owner feedback supports this: buyers often praise clear contrast, sharp enough images for studs, insulation gaps, drafts, HVAC ducts, electrical hot spots, radiant lines in slabs, and other subtle heat patterns.
Function
A thermal camera’s usefulness depends on whether its features match the jobs you need it to handle, from spotting insulation gaps and moisture patterns to checking electrical panels, HVAC issues, or mechanical heat buildup. Look for practical diagnostics such as clear image blending, adjustable emissivity, temperature markers, and easy reporting or storage, and be wary of models that offer flashy extras while lacking the accuracy, resolution, or controls needed for dependable troubleshooting.
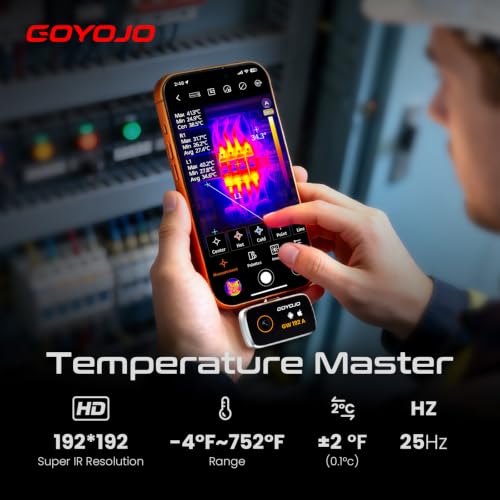
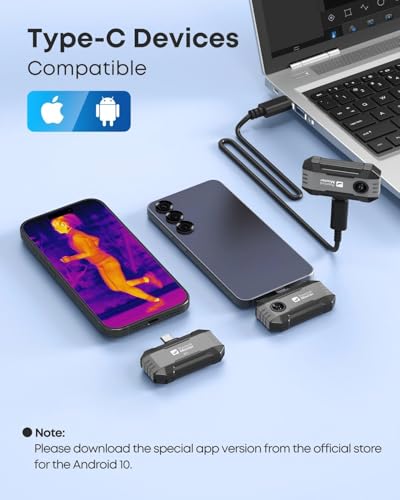
Match the camera format to your actual jobs before choosing: handheld units are better for quick standalone inspections, while phone-connected models can be compact but depend on phone compatibility, app stability, connector orientation, and battery drain. Look for practical inspection features such as adjustable emissivity, multiple measurement points, image capture, temperature range suitable for electronics and mechanical work, and a refresh rate smooth enough to scan walls, panels, engines, or ducts without losing the heat pattern. Owner reports back up that capable budget cameras can handle real home, garage, automotive, HVAC, electronics, boiler, pipe, and insulation troubleshooting, with many users finding them easy for non-specialists to operate.
Build
A thermal camera’s build quality matters because it affects whether you can trust it in real job-site, inspection, or outdoor conditions. Look for a solid housing, protected lens and ports, reliable controls, and clear durability ratings for drops, dust, and water; watch out for flimsy attachments, loose battery doors, or designs that feel more like fragile electronics than field tools.
Inspect the physical design for job-site realities: the lens should be protected, the body or phone connector should not feel fragile, buttons should work with one hand, and a case or cap matters because thermal sensors and lenses are easy to damage in a toolbox. For electrical panels, garages, crawlspaces, and shop work, favor a sturdy housing, secure grip, reasonable drop resistance, and a design that does not put strain on a phone’s USB-C port. Owner sentiment is encouraging here, with buyers describing many budget options as compact, sturdy, well-made, dependable for inspection jobs, and often supplied with useful storage protection.
Value
Value matters because thermal cameras can vary widely in what they deliver for the money, from basic heat-spotting to sharper imaging and more useful analysis features. Look for a camera that matches your actual use case rather than paying for specs you will not use, and watch out for low-cost options that save money upfront but compromise too much on image clarity, accuracy, durability, or software support.
Judge value by whether the camera prevents guesswork in your specific tasks, not by spec-sheet buzzwords: avoid paying for fake high resolution, novelty modes, or a narrow temperature range that will not cover your work. A worthwhile budget thermal camera should provide enough clarity, responsiveness, and measurement control to find insulation gaps, overheated components, HVAC issues, or mechanical trouble without forcing you into repeated upgrades. Owners commonly frame these cameras as strong values when they deliver practical diagnostics, useful resolution, real-time viewing, compact builds, and performance that feels meaningfully useful rather than gadget-like.
Accuracy
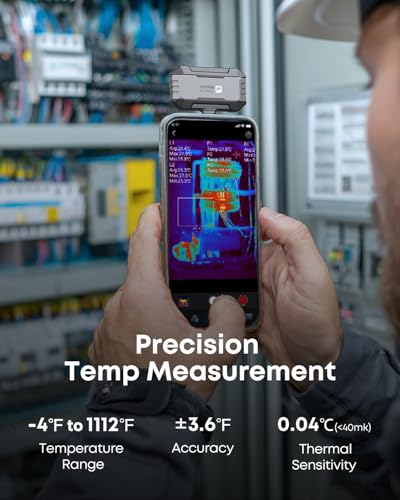
You need reliable accuracy so the hot or cold spots you see actually reflect real conditions, especially when you’re troubleshooting electrical systems, insulation gaps, HVAC issues, or machinery. Look for clear stated temperature accuracy, stable repeat readings, adjustable emissivity settings, and a suitable temperature range for your work; be cautious of cameras that produce impressive images but lack trustworthy measurement specs or consistent monitoring performance.
For accuracy, decide whether you need relative heat pattern finding or trustworthy temperature numbers; budget cameras are often excellent at showing hot and cold areas but need care for exact readings. Look for adjustable emissivity, reflected-temperature or calibration options if available, a suitable temperature range, clear distance-to-spot expectations, and stable readings over time; be especially cautious with shiny metal, glass, moving air, and very small components because they can mislead thermal measurements. Owner feedback supports practical accuracy, with users reporting readings and contrast precise enough to locate unusual hot or cold zones, track small changes as systems heat and cool, identify floor-heating trouble spots, and pinpoint issues in electrical, mechanical, automotive, and home diagnostics.
Ease
A thermal camera should let you start scanning quickly, adjust key settings without digging through confusing menus, and understand what the image is telling you with minimal trial and error. Look for clear controls, intuitive temperature palettes, easy image capture or transfer, and straightforward calibration or focus steps; watch out for cameras that hide basic functions behind awkward interfaces or require a steep learning curve before you can trust what you’re seeing.
Choose an interface that lets you capture the problem before conditions change: fast startup, simple palette changes, obvious temperature markers, easy image saving, and minimal menu digging matter when scanning a wall, breaker panel, engine bay, or HVAC register. If it is phone-based, confirm the app works with your operating system and connector, does not require awkward adapters, and can be launched quickly in the field; if it is handheld, check that controls are readable and usable without constant manual reference. Owners frequently report that budget models are approachable, with intuitive controls, straightforward menus, plug-in-and-open workflows, smooth scanning, and point-and-shoot operation even for first-time thermal-camera users.
1,000,000+ shoppers use Buyer's Guide every week to find the best products and services online.

Helping millions of users make smarter purchases online.